In the Software Testing Bug Life cycle has an important role. As you know WebLogic is also a software and it is developed in Java. There could be
two kinds of bugs:
- Customer Bugs
- Internal Bugs
- Customer Bugs are raised by the Oracle WebLogic customer who facing issue in their enterprise application.
- WebLogic Development team identifies some of the issues then they fall into Internal Bugs
Each bug can be resolved by having a Single Fix. If we have more number of Single Fixes in a version they are collected together every moth and released as Patch Set for a version for example WLS 12.1.3 having a patch 2198345. Over a period of time Oracle creates Patch Set for certain set of bugs.
Steps to perform Patching on WebLogic 12.1.3
Summary of steps
- Download the patch/patchset
- Apply the patch using opatch utility
- Validate the patch installation
Download the WebLogic patch from MOS
My Oracle Support - MOS
1)
You will get the patch or patchset from Oracle support delivery, which you can download only when you are having support ID, that means your company must have customer id from Oracle support.
2)
Download the patch from Oracle website (https://support.oracle.com/) as shown below
a)
Login to Oracle support with your support ID.
b)
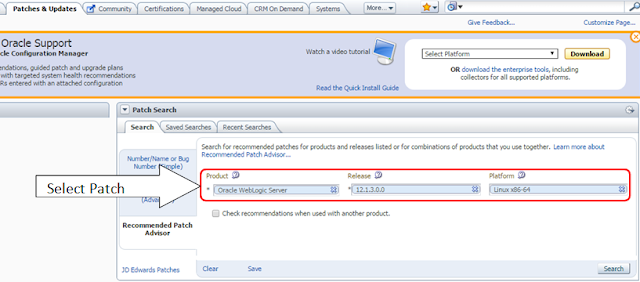
Go to Patches and updates, under the patch search section – recommended Patch Advisor
 |
| Selecting Patch from Oracle Support site |
c)
Select the product, Release and the OS version to the environment you wish to install the patch and click search.
 |
| Search with patch ID |
d)
You can directly download the patch by searching patch ID from right top search bar from support as shown below and search.
e)
Once you find the patch you are looking for you could download it as shown below.
 |
| WebLogic 12c Patch |
f)
Click on the patch. On the next screen you will find an option to download as shown below
g)
Click on the generic.zip as shown below it gets downloaded
 |
| Generic patch for download - WebLogic |
Applying the WebLogic patch using opatch utility
h)
Take this patch.zip to the targeting server and extract it as shown below.
unzip –d PATCH p21983457_121300_Generic.zip
i)
The above command extracts the zip into PATCH folder.
j)
Shutdown the weblogic Admin and managed servers
k)
Once you are done with the shut down backup the middleware home totally.
l)
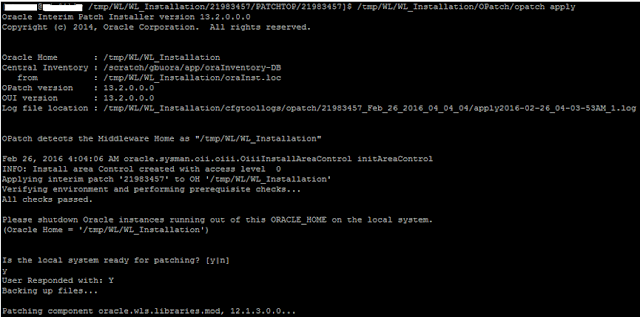
Now go to the patch directory and run opatch apply. As shown below.
The above command has to be ran from the patch folder, /u01/app/fmw/WL_Installation/OPatch/opatch is the location where we have the opatch script .
Command -
/u01/app/fmw/WL_Installation/OPatch/opatch apply
m)
You will be prompted with Y/N, to check if the environment is ready for patch installation. You can proceed with yes by typing y as shown below.
 |
| WebLogic Patching |
n)
Once you are done with the installation, you will see an output confirming patch installation is successful as shown below.
OPatch succeeded
o)
Once you are done you can verify the patch installation as shown below with date and time.
/u01/app/fmw/WL_Installation/OPatch/opatch lsinventory
Rollback of a Patch
1)
Make sure that all the weblogic servers are down.
2)
Go to the directory(Optional) where you have the opatch, type the below command to roll back.
/u01/app/fmw/WL_Installation/OPatch/opatch rollback -id 21983457
3)
Make sure that you have given the correct Patch ID in the rollback command
4)
You will be prompted with Y/N, to check if the environment is ready for patch roll back. You can proceed with yes by typing y as shown below.
5)
If the rollback is successful you will find the output something as shown below.


